This tutorial takes you through the process of using Vue.js to to build an interactive frontend application, Axios that helps connect your frontend application to an API (Application Programming Interface) and Netlify setup for easy deployment and hosting of the developed web application.Vue.js is a popular JavaScript framework that is light weight, easy to learn and has a component based structure making it great to use for front-end web application. Axios is a JavaScript library that can be used to send and retrieve data from the backend or servers. A short introduction to the use of code quality tools is also given.
Prerequisites
- Basic web development skills(HTML, CSS3 & JavaScript, Vue 3 knowledge, API integration, Build and deployment experience. The tutorial is also structured in a way that makes it easy for a beginner to follow.
- For the API, we will use the PostIT API for connecting to our frontend.
- Node.js & npm download and setup in the local environment for dependency management.
- Vue CLI installation and vue.js project creation steps.
- A modern code editor of choice for this tutorial, I used Visual Studio Code
Project structure
Root directory
- public : Static assets that are not processed by Webpack
- src : The main source code directory
- assets : Static files like images, fonts, and global CSS.
- css
- main.css : Main styling for the html 5 elements in the application
- css
- components : Reusable Vue.js UI components
- BrowsePage.vue
- ForgotPasswordPage.vue
- LoginPage.vue
- PostPage.vue
- SignupPage.vue
- router : Configuration for application routing and navigation
- store : State management files (likely Vuex or Pinia)
- App.vue : The root component of the application
- main.js : The entry point that initializes the Vue application
- assets : Static files like images, fonts, and global CSS.
Configuration files
- prettierrc : Configuration for code formatting
- babel.config.js : Configuration for Babel compiler
- netlify.toml : Deployment configuration for the Netlify platform
- package.json : Project dependencies installed via npm/yarn
- vue.config.js : Optional configuration for the Vue CLI
The first step is to set up configuration files after installing Node.js and npm, creating a basic Vue project, and setting up the above project structure.
package.json dependencies
Ensure the following dependencies and devDependenices are installed in the package.json file. In Visual studio code this can be done in the terminal view.
An example on how to install devDependencies. npm i axios or npm install axios or for global installation: npm install –global prettier or npm install -g prettier
An example on how to install dependencies. npm install –save-dev @vue/cli-service@latest
"dependencies": {
    "axios": "^1.13.2",
    "bootstrap": "^5.3.8",
    "vue": "^3.5.26",
    "vue-router": "^4.6.4",
    "vuex": "^4.1.0"
  },
  "devDependencies": {
    "@babel/eslint-parser": "^7.28.5",
    "@babel/plugin-transform-class-properties": "^7.27.1",
    "@vue/cli-plugin-babel": "~5.0.9",
    "@vue/cli-plugin-eslint": "^5.0.9",
    "@vue/cli-plugin-router": "~5.0.9",
    "@vue/cli-service": "^5.0.9",
    "eslint": "^9.39.2",
    "eslint-plugin-vue": "^10.6.2",
    "prettier": "^3.7.4",
    "sass": "^1.97.1",
    "sass-loader": "^16.0.6",
    "vue-eslint-parser": "^10.2.0"
  }
Code formatting with prettier and Eslint
Prettier helps format diverse languages, including JavaScript, TypeScript, JSON, HTML, CSS, and VUE and covers code indentation, quotes, line breaks, spacing, and many more.
Eslint covers code quality and rules, and is often paired with prettier in frontend-based web development.
Prettier and Eslint project setup
In package.json file in the scripts the lines beginning with lint and format are added.
 "scripts": {
    "serve": "vue-cli-service serve",
    "build": "vue-cli-service build",
    "lint": "vue-cli-service lint",
    "format": "prettier --write \"src/**/*.{js,vue,css,scss}\"",
    "format:check": "prettier --check \"src/**/*.{js,vue,css,scss}\""
  },
In the .prettierrc file, the following is added. This can be further edited according to your needs. One can read further in prettier documentation and adjust accordingly to the application’s needs. The highlighted scripts above can be run for code quality.
{
  "semi": true,
  "singleQuote": true,
  "trailingComma": "es5",
  "printWidth": 100,
  "tabWidth": 2
}
In the babel.config.js file, add the following, with further modifications in the references document.
module.exports = {
  presets: [
    '@vue/cli-plugin-babel/preset'
  ],
  plugins: ['@babel/plugin-transform-class-properties'
  ]
}
In netlify.toml file is then configured for the Netlify platform. The npm run build command generates a dist output folder in the root directory. This folder is for the production-ready build and helps with deployment in the Netlify platform.. In the code block, the double square brackets [[ redirects ]] imply that an application can have multiple redirect rules, each in its own block. “/*” is a wildcard, meaning “match any URL path” within the application. to = “/index.html” means all urls are sent to index.html.
[build]
  command = "npm run build"
  publish = "dist"

[[redirects]]
  from = "/*"
  to = "/index.html"
  status = 200
The setup for vue.config.js targets a proxy for API calls during development and is as follows.
module.exports = {
lintOnSave: false,
devServer: {
proxy: {
'/api': {
target: 'https://private-517bb-wad20postit.apiary-mock.com',
changeOrigin: true,
pathRewrite: { '^/api': '' }
}
}
}
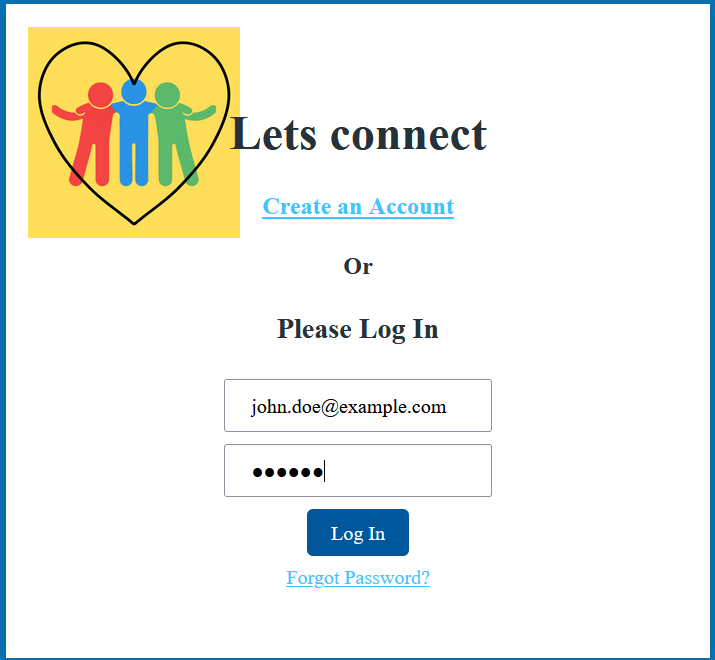
}LoginPage connects you to PostIT API where only user information available is the the following from the GET https://private-anon-f827f4c13e-wad20postit.apiary-mock.com/users/1. One can use the details to connect to the letsconnect app. Password can fill in anything when login in. The ForgotPasswordPage.vue and SignupPages.vue are just added as part on routing and navigation within the Vue.js app. In LoginPage.vue we just mock the only user available in the API. using the email and also mock sign up using the same details.
{
  "firstname": "John",
  "lastname": "Doe",
  "email": "john.doe@example.com",
  "avatar": "https://images.unsplash.com/photo-1500648767791-00dcc994a43e?ixlib=rb-1.2.1&ixid=eyJhcHBfaWQiOjEyMDd9&auto=format&fit=crop&w=334&q=80"
}
LoginPage.vue
<template>
  <section class="login-page">
    <section id="login-container">
      <div>
        <h1>Lets connect</h1>
      </div>
      <div>
        <h4>
          <router-link to="/signup"> Create an Account </router-link>
        </h4>
      </div>
      <div>
        <h4>Or</h4>
      </div>
      <div>
        <h3>Please Log In</h3>
        <form @submit.prevent="login">
          <div>
            <input
              v-model="form.email"
              type="email"
              placeholder="Email"
              autocomplete="email"
              required
            />
          </div>
          <div>
            <input
              v-model="form.password"
              type="password"
              placeholder="Password"
              autocomplete="current-password"
              required
            />
          </div>
          <div>
            <button type="submit">Log In</button>
          </div>
          <div>
            <small>
              <router-link to="/forgot-password">Forgot Password?</router-link>
            </small>
          </div>
          <div v-if="form.error" class="error">
            {{ form.error }}
          </div>
          <div v-if="form.success" class="success">Login successful!</div>
        </form>
      </div>
    </section>
  </section>
</template>
<script>

import { ref } from 'vue';
import { useRouter } from 'vue-router';
import axios from 'axios';
export default {
  name: 'LoginPage',
  setup() {
    const router = useRouter();
    const form = ref({
      email: '',
      password: '',
      error: null,
      success: false,
    });
    const login = async () => {
      form.value.error = null;
      form.value.success = false;
      if (!form.value.email || !form.value.password) {
        form.value.error = 'Email and password are required.';
        return;
      }

      try {
        const url = 'https://private-517bb-wad20postit.apiary-mock.com/users/1';
        const auth = { username: form.value.email, password: form.value.password };
        const res = await axios.get(url, { auth });
        console.log(res.data);
        form.value.success = true;
        router.push('/post');
      } catch (err) {
        form.value.error = err.message || 'Login failed.';
      }
    };
    return {
      form,
      login,
    };
  },
};
</script>
SignupPage.vue
<template>
  <section class="login-page">
    <section id="login-container">
      <div>
        <h1>Lets connect</h1>
      </div>
      <div>
        <h4>
          <router-link to="/">
            Already have an account?<br />
            Log In
          </router-link>
        </h4>
      </div>
      <div>
        <h4>Or</h4>
      </div>
      <div>
        <h3>Create an Account</h3>
        <form @submit.prevent="signup">
          <div>
            <input
              v-model="form.name"
              type="text"
              placeholder="Full Name"
              autocomplete="name"
              required
            />
          </div>
          <div>
            <input
              v-model="form.email"
              type="email"
              placeholder="Email"
              autocomplete="email"
              required
            />
          </div>
          <div>
            <input
              v-model="form.password"
              type="password"
              placeholder="Password"
              autocomplete="new-password"
            />
          </div>
          <div>
            <button type="submit">Sign Up</button>
          </div>
          <div v-if="form.error" class="error">
            {{ form.error }}
          </div>
          <div v-if="form.success" class="success">Signup successful!</div>
        </form>
      </div>
    </section>
  </section>
</template>

<script>
import { ref } from 'vue';
import { useRouter } from 'vue-router';
import axios from 'axios';

export default {
  name: 'SignupPage',
  setup() {
    const router = useRouter();
    const form = ref({
      name: '',
      email: '',
      password: '',
      error: null,
      success: false,
    });

    const signup = async () => {
      form.value.error = null;
      form.value.success = false;

      if (!form.value.name || !form.value.email) {
        form.value.error = 'All fields are required.';
        return;
      }

      try {
        // Replace with your signup API endpoint
        const url = 'https://private-517bb-wad20postit.apiary-mock.com/users';
        const res = await axios.post(url, {
          name: form.value.name,
          email: form.value.email,
          password: form.value.password,
        });
        console.log(res.data);
        form.value.success = true;
        router.push('/');
      } catch (err) {
        form.value.error = err.message || 'Signup failed.';
      }
    };

    return {
      form,
      signup,
    };
  },
};
</script>
BrowsePage.vue
It helps retrieved all profiles from the API that users can follow.
<template>
  <section class="browse-page">
    <header>
      <nav class="navbar">
        <div class="logo-container">
          <img src="../assets/logo.png" alt="postIt" />
        </div>
        <div class="search-container">
          <input v-model="search" type="text" placeholder="Search profiles..." />
          <button type="button" @click="searchProfiles">Search</button>
        </div>
        <div class="avatar-container">
          <button class="menu-button" @click.stop="toggleMenu">Menu</button>

          <div v-show="isMenuOpen" class="drop-down-container">
            <router-link class="menu-link" to="/post"> Posts </router-link>
            <hr class="menu-separator" />
            <router-link class="menu-link" to="/login"> Log Out </router-link>
          </div>
        </div>
      </nav>
    </header>
    <main class="main-container">
      <div class="profiles-scroll">
        <div v-if="profiles.length === 0">Loading profiles...</div>
        <div v-for="profile in filteredProfiles" :key="profile.email" class="profile-card">
          <img :src="profile.avatar" :alt="profile.firstname + ' ' + profile.lastname" />
          <div class="profile-details">
            <h2>{{ profile.firstname }} {{ profile.lastname }}</h2>
            <p>{{ profile.email }}</p>
            <button
              class="follow-button"
              :class="{ followed: profile.followed }"
              @click="toggleFollow(profile)"
            >
              {{ profile.followed ? 'Following' : 'Follow' }}
            </button>
          </div>
        </div>
      </div>
    </main>
  </section>
</template>
<script>
import axios from 'axios';
export default {
  name: 'BrowsePage',
  data() {
    return {
      profiles: [],
      search: '',
      isMenuOpen: false,
    };
  },
  computed: {
    filteredProfiles() {
      const q = this.search.toLowerCase().trim();
      if (!q) return this.profiles;

      return this.profiles.filter((profile) => {
        const fullName = `${profile.firstname} ${profile.lastname}`.toLowerCase();
        return fullName.includes(q) || profile.email.toLowerCase().includes(q);
      });
    },
  },
  mounted() {
    this.loadProfiles();
    document.addEventListener('click', this.handleClickOutside);
  },
  beforeUnmount() {
    document.removeEventListener('click', this.handleClickOutside);
  },
  methods: {
    toggleMenu() {
      this.isMenuOpen = !this.isMenuOpen;
    },
    handleClickOutside(event) {
      if (!this.isMenuOpen) return;
      const menu = this.$el.querySelector('.drop-down-container');
      if (menu && !menu.contains(event.target)) {
        this.isMenuOpen = false;
      }
    },
    async loadProfiles() {
      try {
        const response = await axios.get(
          'https://private-517bb-wad20postit.apiary-mock.com/profiles'
        );
        // Add `followed` state to each profile
        this.profiles = response.data.map((profile) => ({ ...profile, followed: false }));
      } catch (err) {
        console.error('Failed to load profiles:', err);
      }
    },
    toggleFollow(profile) {
      profile.followed = !profile.followed;
    },
    searchProfiles() {
      console.log('Searching for:', this.search);
    },
  },
};
</script>
PostPage.vue
<template>
  <section class="post-page">
    <nav class="navbar">
      <div class="logo-container">
        <img src="../assets/logo.png" alt="postIt" />
      </div>
      <div class="search-container">
        <input v-model="search" type="text" placeholder="Search posts..." />
      </div>
      <div class="avatar-container">
        <button class="menu-button" @click="toggleMenu">Menu</button>
        <div v-show="isMenuOpen" class="drop-down-container">
          <span id="user-name">{{ user.firstname }} {{ user.lastname }}</span>
          <span id="user-email">{{ user.email }}</span>
          <hr class="menu-separator" />
          <router-link class="menu-link" to="/browse"> Browse Users </router-link>
          <router-link class="menu-link" to="/login"> Log Out </router-link>
        </div>
      </div>
    </nav>
    <main class="main-container">
      <div v-if="loading">Loading posts...</div>
      <div v-else-if="filteredPosts.length === 0">No posts found.</div>
      <div class="posts-scroll">
        <div v-for="post in filteredPosts" :key="post.id" class="post-card">
          <div class="author-info">
            <img
              class="avatar"
              :src="post.author?.avatar || defaultAvatar"
              :alt="post.author ? post.author.firstname + ' ' + post.author.lastname : 'Unknown'"
            />
            <div class="author-details">
              <span
                >{{ post.author?.firstname || 'Unknown' }} {{ post.author?.lastname || '' }}</span
              >
              <small>{{ post.createTime || '' }}</small>
            </div>
          </div>
          <p>{{ typeof post.text === 'string' ? post.text : '' }}</p>
          <div v-if="post.media?.url" class="post-media">
            <template v-if="post.media.type === 'image'">
              <img :src="post.media.url" alt="" />
            </template>
            <template v-else-if="post.media.type === 'video'">
              <video controls :src="post.media.url" />
            </template>
          </div>

          <div class="post-likes">❤️ {{ post.likes || '0' }}</div>
        </div>
      </div>
    </main>
  </section>
</template>
<script>
import axios from 'axios';
export default {
  name: 'PostPage',
  data() {
    return {
      posts: [],
      loading: false,
      search: '',
      defaultAvatar: 'https://via.placeholder.com/50x50.png?text=Avatar',
      isMenuOpen: false,
      user: {},
    };
  },
  computed: {
    filteredPosts() {
      const q = this.search.toLowerCase().trim();
      if (!q) return this.posts;
      return this.posts
        .filter((post) => {
          const text = typeof post.text === 'string' ? post.text : '';
          const authorName = post.author
            ? `${post.author.firstname} ${post.author.lastname}`.toLowerCase()
            : '';
          return text.toLowerCase().includes(q) || authorName.includes(q);
        })
        .sort((a, b) => (b.media?.url ? 1 : 0) - (a.media?.url ? 1 : 0));
    },
  },
  mounted() {
    this.fetchPosts();
    this.loadUser();
  },
  methods: {
    async fetchPosts() {
      this.loading = true;
      try {
        const res = await axios.get(
          'https://private-anon-f827f4c13e-wad20postit.apiary-mock.com/posts'
        );
        this.posts = res.data;
      } catch (err) {
        console.error('Failed to load posts', err);
      } finally {
        this.loading = false;
      }
    },
    async loadUser() {
      try {
        const res = await axios.get('https://private-517bb-wad20postit.apiary-mock.com/users/1');
        this.user = res.data;
      } catch (err) {
        console.error('Failed to load user', err);
      }
    },
    toggleMenu() {
      this.isMenuOpen = !this.isMenuOpen;
    },
  },
};
</script>
Setting up navigation in router folder
The application routing is straightforward, utilizing the createWebHistory() section of the HTML5 History API. The history plays a major role in determining how your URLs appear and how navigation functions. This is setup in the index.js file as follows.
import { createRouter, createWebHistory } from 'vue-router';

const routes = [
  { path: '/', name: 'login', component: () => import('../components/LoginPage.vue') },
  { path: '/signup', name: 'signup', component: () => import('../components/SignupPage.vue') },
  {
    path: '/forgot-password',
    name: 'forgot-password',
    component: () => import('../components/ForgotPasswordPage.vue'),
  },
  { path: '/browse', name: 'browse', component: () => import('../components/BrowsePage.vue') },
  { path: '/post', name: 'post', component: () => import('../components/PostPage.vue') },
  { path: '/:pathMatch(.*)*', redirect: '/' },
];
const router = createRouter({
  history: createWebHistory(),
  routes,
});
export default router;
main.js
The App is the root component of your application. The router enables navigation between pages within your application. The file main.css in the assets folder is the global.css file used to style all the HTML5 components within the App.
import { createApp } from 'vue';
import App from './App.vue';
import router from './router';
import '@/assets/css/main.css';

const app = createApp(App);
app.use(router);
app.mount('#app');
In the public folder inside the index.html file one can set up the Apps name , text and icon here for browser tab visibility.
<!DOCTYPE html>
<html lang="en">
  <head>
    <meta charset="utf-8">
    <meta http-equiv="X-UA-Compatible" content="IE=edge">
    <meta name="viewport" content="width=device-width,initial-scale=1.0">
    <link rel="icon" href="<%= BASE_URL %>favicon.ico">
    <title>Lets connect</title>
    <link rel="stylesheet" href="https://cdnjs.cloudflare.com/ajax/libs/font-awesome/4.7.0/css/font-awesome.min.css">
  </head>
  <body>
    <noscript>
      <strong>We're sorry but Lets connect doesn't work properly without JavaScript enabled. Please enable it to continue.</strong>
    </noscript>
    <div id="app"></div>
    <!-- built files will be auto injected -->
  </body>
</html>
You can find the project source code here and once create an account can easily deploy the app by adding the repository to Netlify and it automatically sets for you once have configured the netlify.toml.